But now after all that time it is done. The pictures are hung and we got the area staged just the way we want it. Which should read our laundry isn’t scattered about the floor. So time for the big reveal.
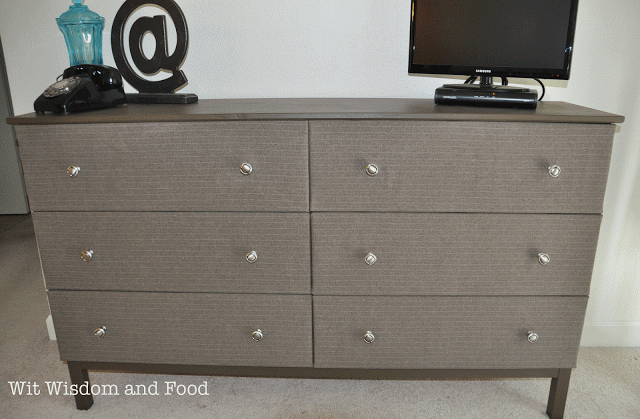
I love how it turned out and how great the drawings look hanging above the dresser.

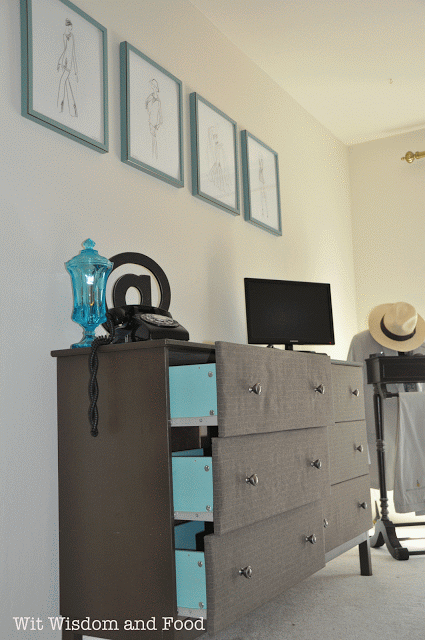
When I started thinking about how to make the dresser unique and a good centerpiece of the wall the idea that excited me the most was covering the drawer fronts with fabric. I was hoping for a nice herringbone but couldn’t find one quickly and wanted to get moving on the project and decided on this great striped suit fabric instead.

Fabric: $30
Hardware: $36
Total- $246
Sorry for the little hiatus I have been on the last month. Just took some me time and worked on a bunch of projects. I will have more up soon hopefully and at least be stopping by all my favorite blogs again soon.
During the time off I did do a guest post over at Attempts at Domestication on my travels to Southern California while she was off in Europe. You can catch up on her trip at her site and get some other tips on everything domestic.
Linked up at:
House by Hoff - 16 week DIY Challenge


LOVVVVVVVVVVVE those fabric fronts!!!
Thanks. I am excited how it turned out. There are so many possibilities. I bet you could do oilcloth for a kids dresser and it would be so easy to wipe down.
Having assembled a few IKEA dressers myself, I totally feel your pain. Who knew there could be so many pieces?!? I love how it turned out, especially the peek of color on the sides! That blue is so pretty.
I always know I am in trouble when the thing I want to buy at IKEA comes in two boxes. This was no exception. It was worth it though for the finished piece.
That dressers looks so awesome! Love the surprise of the blue when you open the drawers. Well done!
Thanks!. It is great to have that cheap IKEA stuff to transform. I need to get over and catch up on all the great things you are probably doing on the new house.
Love that fabric with the paint color you picked for the sides. What a great transformation!!!
Thank Katja.I love laying in bed staring at it. Very proud of that one.
So cute! I love the idea of adding fabric, and I love the pop of color on the sides.
Wow Anne- what a super creative way to change up the look of that Ikea dresser!! I would have never thought to use fabric- great idea:) Thanks for sharing this awesome project at the Get Your DIY On Challenge: Furniture Transformations. We hope you can make it back this evening at 7pm EST to share a holiday sign project - or just come by to get some holiday inspiration!
~Krista from the happy housie