wit wisdom and food

celebrating shared meals

  • home
  • recipes
  • about
  • work with me
    • Marketing & Media Services

turkey buying guide

November 9, 2015 by anne 2 Comments

There are so many steps to getting Thanksgiving dinner on the table. The decisions, and possible stress and anxiety start at the grocery store. Buying the right bird for the right price isn’t as easy. There are so many choices, and terms it can be a bit overwhelming. It doesn’t have to be though. You can navigate this with the tips and vocabulary in this turkey buying guide.

How big should the bird be?

How much turkey you need for the amount of people you are having should be your starting point in turkey buying.

Standard wisdom is 1 pound per person or 1 1/2 pounds if you want leftovers.

We always go a bit over that because there are two of us and we really love the leftovers. For your average 8 people for dinner you need an 8-pound - 12-pound bird. Those aren’t always the easiest to find so go for the smallest you can find. Remember to adjust your cooking plan accordingly based on the size of turkey you are getting.

If there aren’t many of you looking for a turkey breast instead of a whole turkey is also an option, but I vote for leftovers every time.

Will my turkey fit in the oven?

A question only you can answer. If your oven is older it might be on the smaller size and fitting a 20+ pound bird in there is going to be tough. You are trying to get a bird that fits in the oven comfortably so it cooks evenly and isn’t too close to the heating elements.

To figure this out, you might have to measure the height of a bird at the store. Set up your roasting rack and add the height of the turkey to see how it will do in the oven.

If the size turkey you need won’t fit in your oven you have a couple of choices. You can consider roasting two birds or spatchcock the bird and guarantee it will fit in and cook quickly.

Fresh vs Frozen

Fresh turkeys probably aren’t as fresh as you think unless you picked it up at the farm. Fresh usually means the turkey wasn’t frozen. It was instead kept at a low temp, never below 26°F. If you remember elementary science, 32°F is freezing so 26° is below that. Why do you care? When something is at those temperatures ice crystals from. As the ice crystals thaw and refreeze they affect the meat. Giving you a bird that doesn’t taste as good as it should.

So if ice crystals are bad why would I ever consider a frozen bird? The way most birds are currently frozen is a flash-freezing process that limits the amount of ice crystals that form. This helps maintain the integrity of the meat.

I have purchased “fresh” turkeys for the last few years and have been happy with the quality. I am sure a truly fresh bird would taste even better. I haven’t had a frozen bird in years, but they are frequently less expensive.

Regardless of how you bird was stored before it gets to your house there are a few terms you might see on the labels or advertisements that you need to know about. Read through them and as always buy the best bird you can afford.

Self-basted - This will probably be your cheapest bird, but it is also your least natural.This bird has been injected with a solution to help it stay moist during cooking. Sounds great, no? The solution is fat, broth, oil, spices and likely some chemical preservatives. Apparently, it also makes the meat a little water-logged but I have no recent experience with this to tell you one way or the other.

Brined - This bird has been soaked in a solution to help season and lock in flavor. Brined birds are tasty and moist. It has the same effect as the self-basted bird above, but it is a natural solution, usually water, salt & sugar. It doesn’t make the meat water-logged, just moist and delicious.

Natural - This is a tricky one. It would seem like this means the bird was raised in a specific way, nothing was added and it is as close to off the farm as you can get. While that might be the case it isn’t a guarantee. The only requirement for using the word natural is that now artificial or chemical ingredients were used during processing.

Organic - There are two parts to raising an organic turkey. First the bird doesn’t receive chemicals or antibiotics. Second, the bird is fed organic feed. This makes the bird more expensive though it might taste better.

Kosher - Kosher birds are killed according to Jewish dietary guidelines. The big points being that the bird is salted and rinsed in cold water. Because hot water isn’t used in processing the birds, the feathers are harder to remove. When you get a kosher bird be prepared to remove some of the smaller pin feathers when you get it home. However, because it is salted it has effectively been brined giving it a great flavor.

Heritage - This one you need to really plan for. You will have to find a farmer, put your order in months in advance and cook it differently than a traditional bird. Heritage birds are raised completely outdoors and are allowed to conceive naturally. They are allowed to live longer so they are bigger birds with more meat. The meat is leaner and the dark meat is gamier than your grocery store birds which changes cooking method and carving. This turkey will break the bank. A 20lb turkey could run you $200.

If you want more tips for making a Thanksgiving dinner with less stress sign up and download my free guide to a complete Thanksgiving dinner.

Get the Thanksgiving guide for a less stressful Thanksgiving

* indicates required


Email Format


Filed Under: cooking tips, tips Tagged With: epicurious, grocery shopping, thanksgiving, turkey

homemade cake vs box cake showdown

June 9, 2014 by anne 8 Comments

wit wisdom & food homemade vs box cake

Do you use box cake mixes instead of making cakes from scratch? Have you tried one of the many pinterest hacks to make a box cake mix taste more like homemade? I was surprised to see that someone took the time to figure out how to make a box cake taste more like scratch. Why wouldn’t you just make the cake from scratch and skip the box all together?

It got me to thinking what the benefit would be to making a box mix over a scratch cake. It certainly could be that a box cake is faster. Is the time you save worth the quality of cake you get though? It must not be if someone went through the time of figuring out how to make their box cake taste more like scratch. So what is the difference in time? How do the taste of the two cakes differ and would anyone notice?

Here is what I found out from making my own basic yellow cake and a Betty Crocker yellow cake mix and why I think you should just bake your cake from scratch. Just like in the above photo homemade cupcake is on the left and box cake is on the right.

Homemade vs Box ingredients

The box has many ingredients you wouldn’t want in your cake including some I can’t pronounce. The cake from scratch has only the ingredients pictured above. Just what you would want in it and I can, not only pronounce them I can tell you where they came from. Don’t even get me started on the icing ingredients!

wit wisdom & food homemade vs box cake

Homemade vs Box time

The start time was opening the box and the first ingredient measured on the scratch cake. The end time was after I filled both cupcake trays. No surprise the box cake took less time. I did go the extra step and sifted my flour when I made the scratch cake.

how long does it take to make cake from scratch

Homemade vs Box rise

In an effort to get accurate results, I used an ice cream scoop to make sure they had the same amount of batter.The had about the similar height above the cupcake liner. The homemade cupcake seemed to fill out the entire liner better than the box cake.

wit wisdom and food homemade vs box cake

Homemade vs Box color/texture

The homemade cake has a light color that is consistent over every cupcake. It is soft and smooth to the touch. The box cake has some spots that browned more than others. The box cake texture was one of the things I like the least about the box cake. It was sticky. It had a tacky feel like paint that isn’t quite dry yet.

wit wisdom and food homemade vs box cake

Homemade vs Box crumb

Even with my macro lens it is hard to show the difference in the photo. The biggest difference was the homemade cupcake was fluffier and lighter.

wit wisdom and food homemade vs box cake

Homemade vs box taste

It is a shame you couldn’t have stopped by and tasted them both. Take my word for it the scratch cake was much better. It just melted in your mouth. The box cake was good but left and odd coating in my mouth.

wit wisdom and food homemade vs box cake

All the cupcakes went to work. The homemade was the bigger winner. The icing on the homemade version was a seafoam icing. It is a boiled icing made with only 6 ingredients; egg whites, sugar, water, light corn syrup, cream of tartar and vanilla. Using brown sugar instead of white is what makes it a seafoam icing and gives it a caramel flavoring. Boiled icing has a sort of marshmallow consistency that makes it one of my favorites.

The differences weren’t drastic in the finished products but for me and mine the extra minutes are worth it. I think the homemade cake tasted so much lighter and delicious compared to the box cake. Plus I like knowing exactly what is going into my cake. and it feels like more of a labor of love to make it from scratch. Bonus is that when you tell someone you made it from scratch they will inexplicably be awed.

Filed Under: cooking tips, tips Tagged With: box cake, crumb, homemade, scratch, seafoam icing, showdown, yellow cake

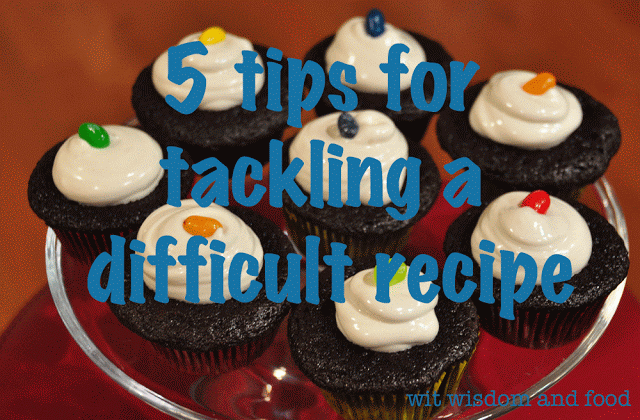
5 tips for tackling a challenging recipe

November 19, 2013 by anne 4 Comments

A few weekends ago (I am so slow at posting these days) I made Coq Au Vin Julia Child style. Coq Au Vin is a dish that sounds complicated and over the years many versions have emerged. For the added challenge I decided to make Julia’s version over say Martha’s. Though if I were to hazard a guess Martha’s is probably more complicated and more challenging. I also decided to tackle my first dessert out of the Miette Cookbook, Old fashioned cupcakes. The thing both these recipes have in common is their fear factor. These recipes have so many steps I was scared to start.

I have been baking and cooking for a couple decades now. Wow that sentence will make a girl feel old. In those decades I have learned a few things that have helped me conquer the most daunting recipes.

1. Read the recipe from beginning to end
If you do nothing else start by sitting down and reading the entire recipe from start to finish so you know what all the ingredients are, if there are things that need extra to cool or marinate, and if you have all the equipment. Nothing will ruin a recipe faster than not having what you need.

I don’t pay heed to this enough. I do it more on recipes that I think will be easy and about 20 minutes in realize I need something I don’t have and have to improvise which doesn’t always work out.

2. Give yourself enough time
If you have never made a recipe before and you really want it to come out right allot enough time to get it done. If you have a recipe that you think will take an hour give yourself an extra 30 minutes to prep and get organized before you start.

I have found that the recipes that state how long it should take to make leave me rushing to get it done or dinner is late to the table. Turns out I am slower in the kitchen and I enjoy the prep so I give myself time to relax and enjoy the project.

3. Prepare all your ingredients in advance
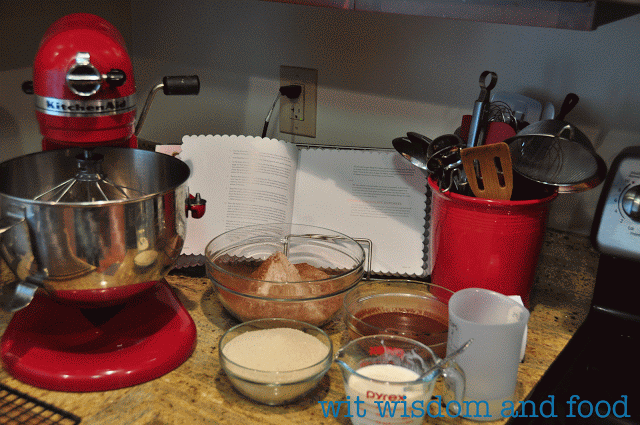
Mise en place is extremely important to professional and home chefs. Mise en place is a a french cooking term that means to put in place. It means to get everything ready and in its spot before you start cooking. If you take the time to measure out everything in advance before you start mixing you will be assured your food isn’t burning while you chop that last ingredient or your whipped egg whites aren’t falling as you sift the flour.

When I first started watching Martha Stewart I was fascinated with all her little bowl she used when cooking. I thought that was just because she was demonstrating on tv and that was probably part of it, but my prep bowls are one of my favorite kitchen items because it keeps everything in its place and ready to use. It makes the recipes seem less daunting when I get started. I kick myself every time I don’t follow this tip.

4. Go slow and be thorough
Most recipes are going to take that time they are going to take. You can’t speed up browning or baking or any other process of cooking. So make it deliberate and go slow. The more attention you pay to the details the better your recipe will come out. It will also help with ways to change the recipe for next time.

5. Go easy on yourself
Most likely you are not a professional chef so cut yourself some slack. If your recipe comes out tasting good but not as pretty it was a success. You can fine tune your skills and work up to pretty. Don’t beat yourself up so much that you don’t want to try again. Like any skill you have to practice.

My cupcakes didn’t all turn out pretty. I didn’t pay enough attention when I put the hot sugar mixture into the kitchen aid for my boiled icing and it splattered all over the sides of the bowl making very pretty rock candy. Some of these pieces got into my piping bag and made it extremely tough to get the icing onto the cupcakes. About half turned out looking close to the bakeries. I celebrated those 12 cupcakes like I had conquered the world. I was waving my hands in the air like a boxer that just won a 12 round bout.

There should probably be a sixth tip and that is have fun. Just enjoy the time in the kitchen and the results, whatever they are, will make any tough recipe possible.

What recipe have you been too afraid to try? Do you have big plans for a new Thanksgiving dish?

Be sure to come back tomorrow for the third issue of whet your whistle wednesday.

Filed Under: cooking tips, tips Tagged With: baking, cooking, coq au vin, Julia Child, miette, tips

handmade flour tortillas

March 25, 2013 by anne 3 Comments

I come from a family with a strong connection to food. My parents and grandparents have been trying new things in the kitchen and keeping up with trends for decades. I married into a family that has an equally strong connection to food. They have been passing recipes down to new generations for decades. I am both excited and intimidated by this. I enjoy trying new recipes and new things in the kitchen but trying to recreate something I have never eaten and that my husband remembers vividly makes me frightened and touchy about feedback.

My husband is from a large family and his mom’s side is Mexican. Some cultures have a stronger recipe arsenal that gets passed down from generation to generation and the mexican culture is one of those cultures. There are recipes that are always made for certain holidays and are always the center of family gatherings. Everyone remembers their own favorites and if you can agree on nothing else in a large family it appears you can almost always find common ground talking about the recipes grandma made. There are so many great stories about Tom’s grandma, aunts and mom in the kitchen together. At some point during any visit with his family the conversation drifts to memories of these recipes. The joy they have telling these stories and talking about the food they grew up on can been seen on their faces and heard in their voices. Some of the recipes are ones that my mother-in-law found on her own and passed on to her daughters. Recipes like the carrot cake, pancakes, and hot cross buns fall into this category. Others like the tortillas, albondigas and tamales are recipes that have come from her mother and have since been passed on. I love listening to the stories he tells about each of his favorite recipes.

Luckily, they recipes are documented even if some of them have no measurements and are written in spanish. In the marriage I got some amazing recipes and of course a husband. I was also lucky enough to get a some new sisters and by some I mean 5. All five of the them have been great about sharing stories and recipes. I am grateful to them for answering my panicky text messages, emailing when I need a recipe, answering question about how things taste or photocopying stacks of recipes for me. I made learning some of these recipes one of my Baker’s dozen goals this year so making them wouldn’t become something I never got around to. Sticking strong to my goals, the other day I finally mustered up the courage to try the flour tortilla recipe. Prior to this I watched them being flattened and cooked once. I have eaten them twice. I still felt completely overwhelmed when I read the recipe.

The most challenging thing about making recipes handed down from grandmothers is they read like folklore. This isn’t like the recipes from my mom, a photocopy of a recipe from the newspaper that has important notes in the margins. This is a hand written recipe that says informative things like, add some of this then add some of that and mix. Then form and cook. The translation of this is; mix and then form them just like you used to watch me do and then cook until they look how you remember. I wasn’t lucky enough to sit with this amazing group of women and watch them cook so I don’t have these memories. I have instinct and a desire to make my husband happy.

After a few deep breaths, a text to find out what kind of margarine to buy and a resolve that if it didn’t turn out perfect it would be ok as a first try, I was able to get started. Lucky for me the recipe said you can’t over knead them because there was a point when all the ingredients were mixed together that I almost quit because I couldn’t imagine how this sticky mess was going to come off my hands or ever turn into anything usable. I kept with it and eventually the dough was smooth and silky just like the recipe said. I was so excited. I formed the balls just like I had seen and let them rest. Then I rolled them and Tom cooked them on the griddle. I was really proud of them because they looked like tortillas when we were done. That was all I needed for round one. As long as they looked like what I have eaten I knew I would feel good about it. I was still a little scared to eat one.

Tom is extremely sweet and supportive of me trying these recipes. He is also very honest about if they are anything like his mom’s. There is no telling me they are good just to be nice. So when he ate the first one and said these are good and really similar I called it a success. After dinner he offered this very excited and sincere nugget: “Now you need to make the beans too. The tortillas are good but the flavor is just different with the beans.”

Our tortillas by no means look perfect but they are homemade and most times that is better than perfect. Making tortillas is so much easier than I thought, with relatively little planning and few ingredients you can make a batch rather quickly. I found the entire process to be very relaxing. I made a second batch the other day, to go with the beans I made, and I am slowly getting better at tortillas. For the record, Tom was right they are better with the beans. Can’t wait for my new electric griddle to arrive so I can have a larger cooking surface and better control over the heat.

pinch off balls of dough between your thumb and forefinger
The thinner we got them when rolling the better we liked them
They bubbled up after a little time on the griddle and that is when we flipped them

You can’t send me panicky text messages but I am open to answering questions via email if you have them. If you want more information I checked and there are lots of great links out there that will show you videos on how to make your own tortillas. I am going to tell you now that reading those or watching videos is nothing compared to the experience you get with real world practice. The beauty of simple foods like these is that you make them how you like them and learn your own techniques over time. Years from now I will be able to do this in my sleep. When I pass this recipe down it will probably read: mix and then form them just like you used to watch me do and then cook until they look how you remember.

Do you have recipes handed down from grandma or mom? Are the recipes easy to follow

Filed Under: cooking tips, tips Tagged With: family recipe, mexican food, tortillas

pan roast a pork chop

March 5, 2013 by anne 2 Comments

Have you ever had that moment of picking up a magazine and wanting to make the recipe on the cover immediately? When this Bon Appetit showed up at the house I desperately wanted to make it. I also immediately thought that looks really hard and I don’t know if I can pull it off. After reading the issue it sounded achievable. Bon Appetit has done this to me before, lured me in with positive talks and instructions that allude to an easy meal. I was suspect but in my goal to cook from every magazine I get this year I decided to go for it. Plus I love pork chops. I usually make them very dry so for a while I stopped making them and only ordered them at restaurants. This magazine claim that I can pan roast a pork chop like the pros had me hook line and sinker though.
I am happy to announce I think I pulled this one off nicely. I want to thank the writers at Bon Appetit that did not lead me astray this time. I have renewed faith in your instructions and my ability to follow them. My ability to follow them was admittedly most likely the problem with the other recipes and had very little to do with their ability to write a recipe. You have to agree with the photographic proof that my pork chop looks surprisingly similar to the cover of the magazine.

I was very proud of this one. I learned a few things the hard way as I usually do. Make sure your pork chop is the same size as the recipe. Mine was exactly half the thickness so it cooked in half the time. Logical huh? Probably should have seen that one coming. Luckily I was paying more attention to the color than the clock and I got it off the heat before it was dry and ruined. The step of brining probably helped a lot with keeping them moist. As usual though I decided to make this recipe but didn’t read it until about 4 hours before I was going to be cooking. The recipe says to cover and chill the pork chops in the brine for 8-12 hours. I went with 4 cause it was what I had. The thinner pork chops probably helped make this less of a mistake. I will definitely make this again.

My smaller chops cut out some of the things suggested in the recipe. I didn’t cut the meat off and sprinkle with salt. I served it as individual chops. I didn’t turn the chop while it was resting because I left it tented to stay warm while I finished the side dishes. Because I was off on the cooking time it threw off the timing of my other dishes so I was too busy with those to turn my chop often.

Pan-Roasted Brined Pork Chop

recipe from Bon Appetit magazine, January 2013

1/2 cup kosher salt
1/2 cup sugar
1 teaspoon juniper berries (I didn’t have these on hand and left them off)
1/2 teaspoon whole black peppercorns
1 head of garlic, halved crosswise, plus 2 unpeeled cloves for basting
2 large sprigs thyme
1 2″ thick bone-in pork chop (2 ribs; about 1 1/4lb.) *I used two chops about 1″ thick instead
2 Tablespoons vegetable oil
3 Tablespoons unsalted butter
Flaky or coarse sea salt

Bring 2 cups water to a boil in a medium sauce pan. Add kosher salt, sugar, juniper berries, peppercorns, halved head of garlic, and 1 thyme sprig; stir to dissolve salt and sugar. Transfer to a medium bowl and add 5 cups of ice cubes. Stir until brine is cool. Add pork chops; cover and chill for at least 8 and up to 12 hours.

Preheat oven to 450 degrees. Remove chops and pat dry. Heat oil over medium-high heat in a large cast-iron or other oven proof skillet. Cook chop until beginning to brown, 3-4 minutes. Turn and cook until second side is beginning to brown, about 2 minutes. Keep turning chop every 2 minutes until both sides are deep golden brown, 10-12 minutes total.

Transfer skillet to oven and roast chop, turning every 2 minutes to prevent it from browning too quickly, until an instant read thermometer inserted horizontally into center of meat registers 135, about 14 minutes. (Chop will continue to cook during basting and resting)

Carefully drain fat from skillet and place over medium heat. Add butter, 2 unpeeled garlic cloves, and remaining thyme sprig; cook until butter is foamy. Carefully tip skillet and, using a large spoon, baste chop repeatedly with butter until butter is brown and smells nutty, 2-3 minutes.

Transfer pork chop to prepared rack and let rest, turning often to ensure juices are evenly distributed, for 15 minutes. Cut pork from bones, slice and sprinkle with sea salt.

Filed Under: cooking tips, dinner, recipes, tips Tagged With: bon appetit, magazine, pan roast, pork chop

Thanks for stopping by!

Every eater has a responsibility to make good food choices, learn to cook and pass all that information on to others. I created this blog to do my part and share my knowledge and my stories. If you ever have a question please don't hesitate to ask. Read More…

rss twitter pinterest instagram facebook mail

Signup for ideas on shared meals and connecting with people through food
* = required field

powered by MailChimp!

Subscribe to Blog via Email

Enter your email address to subscribe to this blog and receive notifications of new posts by email.

Help us start our own shared meal traditions

search

Top Posts

  • homemade cake vs box cake showdown
  • how to store & eat: starfruit
  • lucky penny or pennies
  • Chip It with Sherwin-Williams
  • my favorite Whole 30 foods
    my favorite Whole 30 foods
Legal Disclosures and Privacy Policies
Wayfair Homemakers

Copyright © 2016 · Lifestyle Pro Theme on Genesis Framework · WordPress · Log in